
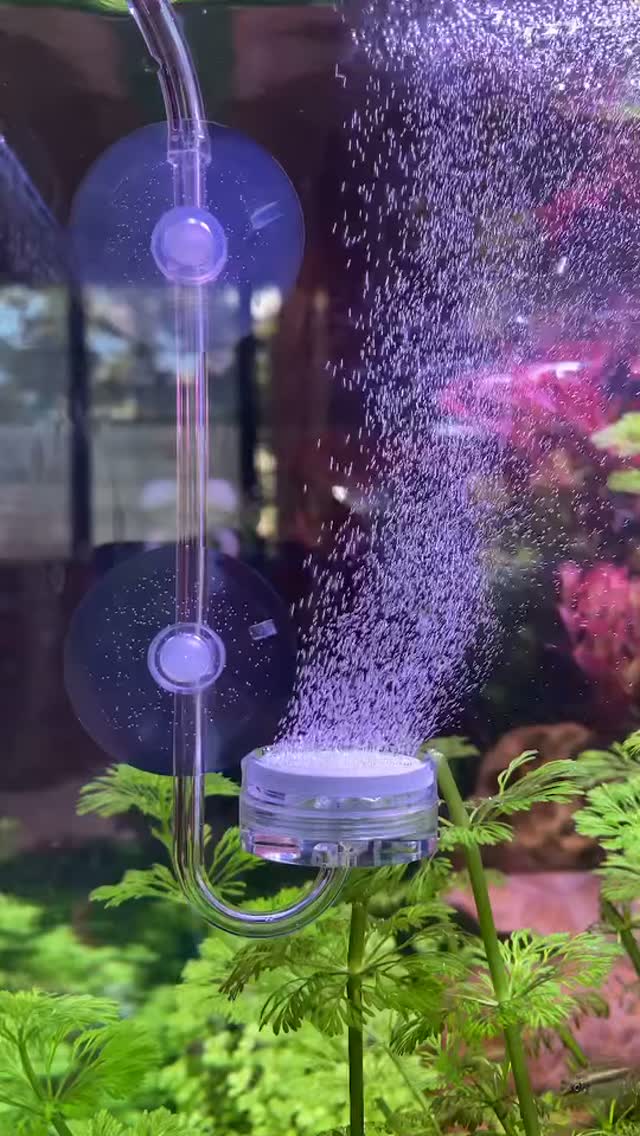
Bad bubbles mean a CO2 diffuser is passing gas it never breaks down: fat, rattling bubbles that race to the surface instead of a fine white mist drifting through the plants. The usual causes are a working pressure below what the ceramic needs, a clogged or cracked membrane, a leaking joint, and a diffuser placed where the filter flow cannot carry its mist. Each has its own test.
What do bad bubbles from a CO2 diffuser look like?
A ceramic diffuser that is working gives you something closer to smoke than to bubbles: a dense white cloud leaving the whole face of the disc, drifting sideways with the tank's flow and disappearing well before it reaches the surface. Bad bubbles are the opposite. You can follow them with your eye, they leave from the rim or from a single weak spot instead of the full face, they come in a pulsing hiss-and-burp rhythm rather than a steady stream, and they arrive at the surface whole and pop there. Gas that pops at the surface has left the tank without feeding anything.

"Not reaching" is the other side of the same complaint, and it is a different fault. Here the mist is fine, it simply goes where the plants are not. It rises in a column straight above the disc, or it hugs a corner, while the carpet at the far end of the tank never gets a trace of it. The tell is uneven pearling: plants within a hand's width of the diffuser throw oxygen bubbles after lights-on and the stems at the other end sit flat all day.
- Bubbles you can count as they rise, instead of a cloud you cannot
- Mist leaving the rim or a single spot, not the whole ceramic face
- A pulsing rhythm: pressure builds, the diffuser burps, it goes quiet
- Bubbles reaching the surface intact and popping there
- Pearling only on the plants nearest the diffuser
| What you see | Likely cause | What to check |
|---|---|---|
| Fat bubbles you can count, rising straight up | Working pressure below the ceramic's minimum | The regulator's working gauge against your diffuser's stated minimum, 40psi |
| Mist from the rim or a single spot only | Partly clogged ceramic face | Pull the diffuser and soak the ceramic |
| A steady hiss, or gas escaping at a fitting | Loose nut, dry seal or tubing not fully home | Soapy water on every joint, and the cylinder washer |
| Bubble rate drifting on its own | Leak upstream, or a cylinder running down | The cylinder joint first, then the working gauge |
| Fine mist that goes straight to the surface | Diffuser sitting outside the filter flow | Move it low and into the path of the outflow |
| Mist near the diffuser, far plants never pearl | Circulation, not the diffuser | Outflow direction, and still layers over the carpet |
| No mist at all, bubbles stop at the counter | Blocked ceramic, or the needle valve closed | The needle valve, then the ceramic |
Why is my diffuser making large bubbles instead of mist?
A ceramic membrane only mists when the gas is pushed through it hard enough to use every pore. Almost every large-bubble complaint comes back to that sentence: either the push is too weak, or the pores are not available, or the gas has found an easier way out than through the ceramic.
The working pressure is too low
Each diffuser has a minimum working pressure, and below it the gas takes the few widest pores and leaves as drops rather than as mist. The figure is on the product page for your model, and for our in-tank Bazooka Flux diffuser it is 40psi. It is set on the regulator's working gauge, not with the needle valve. The needle valve meters how much gas goes through; the working pressure decides how it comes out the other side. Raise the pressure to the stated minimum, give the system a few minutes to settle, and watch the face of the disc rather than the counter.

The ceramic is clogged
Ceramic blocks from the water side, not from the gas side. Organics, a fine film of algae and limescale fill the outer pores, so the working pressure climbs, the gas concentrates on whatever pores are still open, and the mist coarsens month by month. A diffuser that started out misting and slowly got worse is almost always this one. Cleaning restores most of it, and a membrane that will not come back is a replaceable part rather than a dead diffuser: the inline unit's membrane is sold on its own.
The ceramic is cracked, or a joint is leaking
If coarse bubbles appear suddenly rather than gradually, look for an easier escape route. A hairline crack in the disc, a ceramic that has worked loose in its seat, a nut tightened onto a dry or tired seal, or tubing pushed on without reaching the shoulder will all pass unbroken gas. Brush a little soapy water over the joints with the gas running and a leak grows its own foam. At the cylinder end the seal is a consumable, so a replacement washer belongs with every refill.
The diffuser is undersized for the tank
A disc asked to pass more gas than its area can handle will coarsen at the top of its range even when it is clean and the pressure is right. Our in-tank diffusers are sized by aquarium volume, with the split between the small and the large IO body at about 150l, so check your tank against that figure before you blame the unit. It works in reverse too: a generous disc on a modest tank mists happily at a low rate.
How to check the working pressure and the bubble count
Work in order, because each step hides the next. Let the system run until the gauges settle, then read the working pressure against your diffuser's stated minimum. Next, watch the bubble counter for a while and satisfy yourself that the rate is steady; a rate that drifts on its own is a leak or a cylinder running down, not a diffuser problem. Only then judge the mist, and judge it at the plants rather than at the disc.
Then resist the obvious move. When the mist is not reaching the plants, raising the bubble count pushes more gas into a distribution that is already failing: most of it surfaces, the fish pay for it, and the far plants still get little. A safe starting rate is usually quoted per tank volume: 1 bubble per second, and it is a starting point to tune from rather than a target to hit.
How to clean a clogged CO2 diffuser ceramic
Cleaning is a soak, not a scrub. The pores are finer than anything you can safely put on the face of the disc, and a brush or a pick closes more of them than it opens.

Some habits keep the next clean further away: water only in the bubble counter, because oils and specialist fluids contaminate the membrane, and a mounting position where the flow keeps the face swept instead of a still corner where film settles on it.
- Shut the gas off at the regulator and take the diffuser out of the tank, or out of the hose line.
- Rinse the loose material off under running water, without touching the ceramic face.
- Soak the ceramic in dilute household bleach, or in hydrogen peroxide, at the dilution and for the time the bottle supports, usually 15 minutes.
- Rinse it thoroughly, then soak it in water with a dechlorinator so nothing carries bleach back into the aquarium.
- Refit it, set the working pressure to the stated minimum, and expect coarse bubbles until the membrane is thoroughly wet again.
Where to put the diffuser so the mist reaches the plants
Distribution is the filter's job, not the diffuser's. Mist has no push of its own beyond rising, so it goes where the water goes. Put the disc low and deep, in front of or underneath the filter's outflow, and at the opposite end of the tank from the return, so the mist is picked up and carried the length of the aquarium before it can surface. A column of mist going straight up is telling you the diffuser is sitting outside the current.
Surface agitation is the trade-off nobody likes. It brings oxygen in overnight and it strips dissolved gas by day, so a hard-rippling surface and a diffuser working against each other is a common, self-inflicted version of mist that never reaches the plants. Pick a flow pattern that turns the whole tank over without breaking the surface hard, and let the drop checker tell you whether you got away with it.
- Low and deep: the longer the mist stays in the water, the more of it dissolves.
- In the path of the outflow, not tucked behind the hardscape.
- At the far end from the return, so the mist has to cross the tank.
- Angle a lily pipe or spray bar along the glass to make a circuit, not down into the substrate.
- Watch the carpet: a dense foreground holds a still layer that mist never enters, so aim the flow down the front glass.
When an inline atomizer is the better fix
If you run an external filter, moving the job out of the tank solves placement for good. An inline atomizer sits in the filter's outlet hose, so everything the filter returns carries mist with it and distribution becomes the filter's problem rather than yours. It also takes the glassware off the back wall. The trade-offs are real: it needs CO2-rated tubing rather than silicone, and it asks for a higher working pressure than an in-tank disc, 40-50psi on its product page. With an internal filter, or no filter at all, an in-tank unit parked under the flow is still the practical answer.
Read the drop checker, not the bubbles
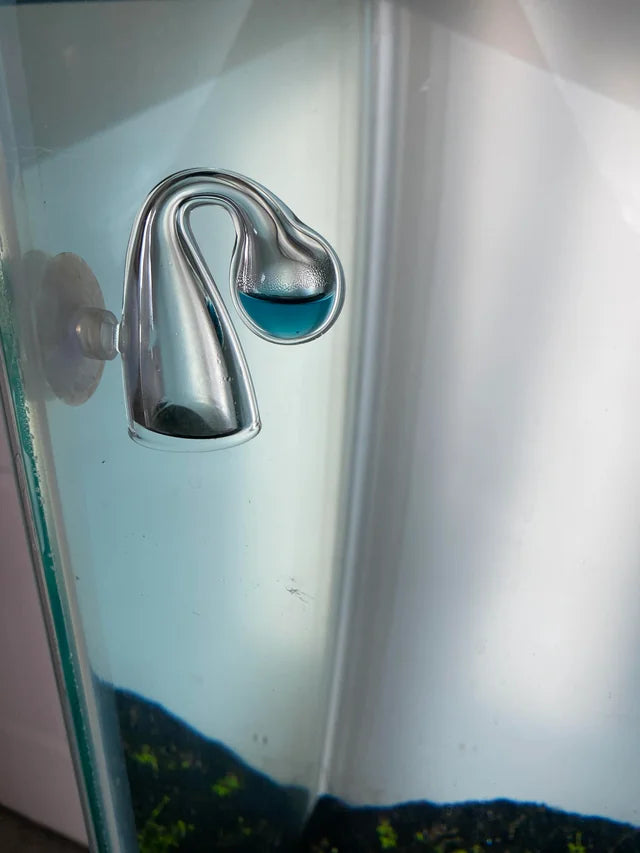
The bubble counter measures what leaves the cylinder. The plants respond to what is dissolved in the water, and those are not the same thing while mist is surfacing or pooling in a corner. A drop checker set reads the water itself: the indicator sits blue when dissolved gas is low, green in the range planted tanks aim for, and yellow when there is too much. It lags by hours, which is a feature rather than a flaw, because it averages the day instead of reporting the minute.
Place it away from the mist stream and away from the surface, ideally at the far end you are worried about, and read it at the same time each day. A checker in the far corner that stays blue while a checker beside the diffuser turns green is distribution, stated plainly. The indicator has a defined strength, 4dkH, so use the solution the checker is sold with and never tank water.
Frequently asked questions
Why is my CO2 diffuser making big bubbles instead of mist?
Usually the working pressure is below what the ceramic needs, or the pores are clogged from the water side. Check the regulator's working gauge against the figure on your diffuser's product page, then clean the ceramic. Coarse bubbles that appear suddenly point to a crack or a leaking joint instead.
Does a new or freshly cleaned diffuser need breaking in?
Yes. A dry membrane passes coarse bubbles until water has worked its way into every pore. Leave it running at the stated working pressure and judge it the next day rather than minutes after refitting it.
Why does the mist not reach the other end of the tank?
Because mist travels on the current and not on its own. The diffuser is probably outside the filter's flow path. Move it low, in front of the outflow and at the far end from the return, then look for a still layer sitting over a dense carpet.
Should I raise the bubble count if the mist is not reaching the plants?
No. More gas through a failing distribution mostly surfaces, and it puts the fish at risk for nothing. Fix the pressure, the ceramic and the placement, then tune the rate slowly and let the drop checker confirm what the plants actually get.
Can I clean a CO2 diffuser without taking it out?
Not properly. The blockage is in the outer pores and it needs a soak in dilute bleach or peroxide, a thorough rinse and a dechlorinator bath. Wiping the face inside the tank closes pores rather than opening them.
If the ceramic has had its last clean, our in-tank and inline units are together on the aquarium diffusers page.

分享:
水草缸 CO2 添加:它对水草有什么作用,以及如何开始添加